Create Your Own Site Data Outside UK & Ireland
This guidance note explains how to create site data for wind loading using MasterKey Wind Analysis, with particular focus on sites outside the UK and Ireland.
It is assumed that the user is reasonably familiar with BS 6399 Pt 2 – Loading for Buildings – Wind Loads.
For the full manual, refer to 📄 Wind Panel Loading (Pro)
Option 1: Creating User-Defined MasterKey Wind Analysis Site Data
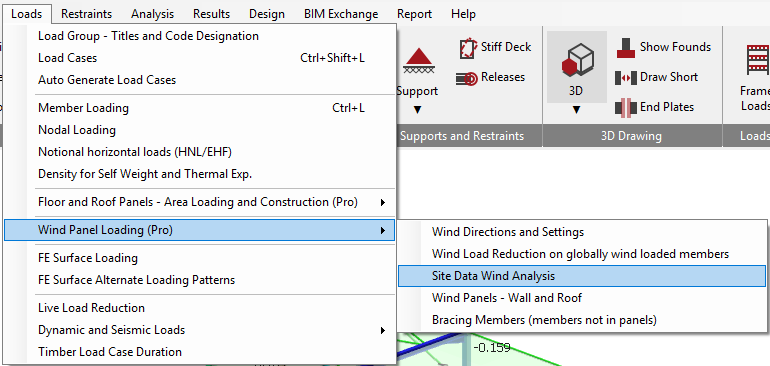
- Navigate to Site Data Wind Analysis
- Loads->Wind Pabel Loading ->Site Data Wind Analysis
Site Data Tab
- Select the Site Data tab.
- Enter a Site Reference (a short tag/name that you will recognise later).
- Enable User defined site.
Enter the site wind inputs appropriate for the location, for example:
Basic wind speed
Site range
Sp value

Obstructions tab
- Select the Obstructions tab.
- Untick: Use UK direction factor
- Tick: Obstructions to include shielding effects.
- Enter the height and spacing distances to adjacent obstructions.

Sea / Country / Town tab (Fetch distances)
- Select the Sea/Country/Town tab.
For each wind direction, enter the distances from the site to:
the edge of Town
the edge of Country
the edge of Sea (or significant inland water)

The factors entered in this section are used to determine the site terrain roughness at each fetches. When the distances and terrain are provided, the software calculates the site roughness and then applies the corresponding roughness factor Cr, Exposure factor Ce, Exposure adjustment factor CeT and roughness correction CrT in the wind pressure calculation.
The fetch distances for the 12 radial segments, gives the terrain category map shown below, where red represents town, green represents country and blue represents sea or significant inland waterway. (Note that the circles representing 1km, 10km and 100km are logarithmically spaced.)

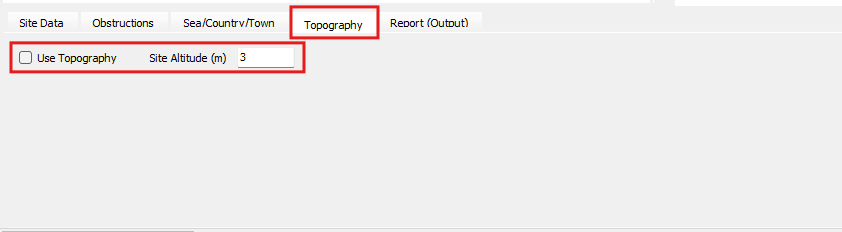
Topography tab
Select the Topography tab.
Enter the site altitude.
Enter the topography location/details for the site as required.

If topography information is not available:
Untick Use topography
Enter the site altitude
- select the topography tab, enter the site altitude and enter the the topography location of the site location.
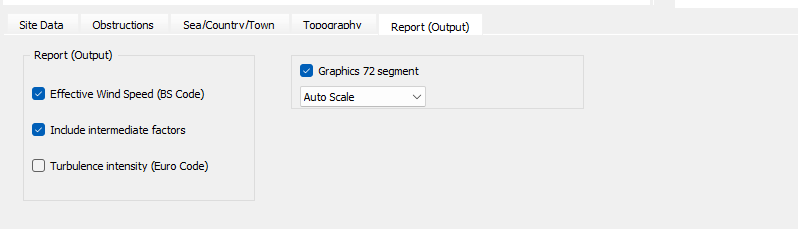
Report tab
Navigate to the Report tab.
Select the required report options for your output
Having created your own site data, close the master key wind analysis page and proceed application of wind
Use the new site data in your wind loading
Once site data has been created:
Close the MasterKey Wind Analysis window.
Proceed to apply wind loading using your newly created Site Reference / site definition in the wind loading workflow for the model.
Option 2: Manual entry of Q values
Main Article: 🎥 Applying Wind Loads outside the UK & Ireland 2019
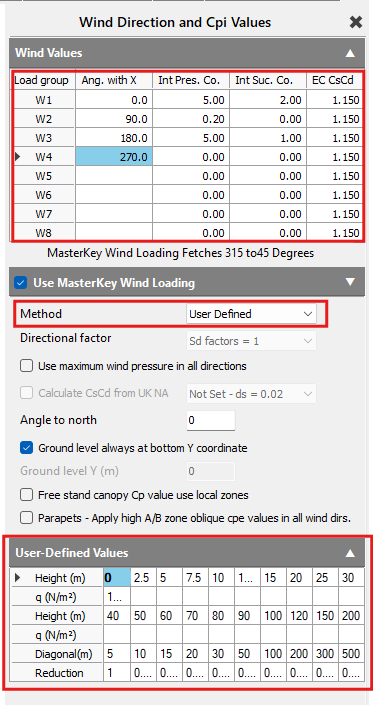
Wind Direction and Cpi Values
- Navigate to the Wind Direction and Cpi Values table
- Loads → Wind Panel Loading → Wind Direction and Cpi Values
- Enter wind direction and internal pressure values
- Select the appropriate load group.
- For each load group, enter:
Wind direction
Internal pressure (Cpi, pressure)
Internal pressure (Cpi, suction)
Defining Q Values
- Set Method to under Use master key wind loading to User defined
- Enter the user defined q values (wind pressure values) for the relevant directions and cases.
- Enter any reductions where applicable (for example, where your design method permits reductions for shielding, area, height bands, or other project specific assumptions).
Apply wind panel loads to walls and roofs
Go to Wind Panel - Wall and Roof under the loads
Assign wind loads to the wall panels and roof

Option 3
Overriding kN/m2 Values
This can be done by turning off the Use Wind Loading option within the Wind Directions and Settings.

This will allow you to specify a kN/m2 value within the Loads Cpe Tab within the Wind Panels menu.

Read more here: 📄 Load / Cpe Tab and Funnelling