Wind Application on Open-Sided Portal Frames in MasterFrame
Overview
For open-sided portal frames, the main modelling requirement is to set the roof panels as Wind on both sides (Canopy). MasterFrame will then recognise the open-sided condition, determine the number of open sides, and apply the relevant internal pressure coefficients from BS 6399-2 Table 18.
The wall panels should remain as normal wind panels. The software will still apply the appropriate internal pressure effects to the inside of the remaining enclosed walls when wind enters through the open side.
For an open-sided portal frame, wind loading is handled differently from a fully enclosed building. Where one or more elevations are open, wind can act both externally and internally, particularly on the roof.
In MasterFrame, the key requirement is to correctly identify the roof as being exposed to wind on both sides. The software can then determine the open-sided behaviour and apply the appropriate pressure coefficients.
Correct Setup
For an open-sided portal frame:
| Element | Recommended Setting |
| Roof panels | Set as Wind on both sides (Canopy) |
| Wall panels | Leave as normal wind panels, (uncheck 'Wind on both sides') |
| Open elevations | Do not create wall panels where there is no cladding |
| Parapet option | Do not use for the connected building walls |
Only the roof panels should normally be set to Wind on both sides. The connected wall panels should not be set as Wind on both sides (Parapet).
Setting the roof as Wind on both sides (Canopy) allows MasterFrame to recognise the structure as open-sided and determine the internal pressure effects accordingly.
To confirm that the software has recognised the open-sided condition, turn on the Wind Zone labels.
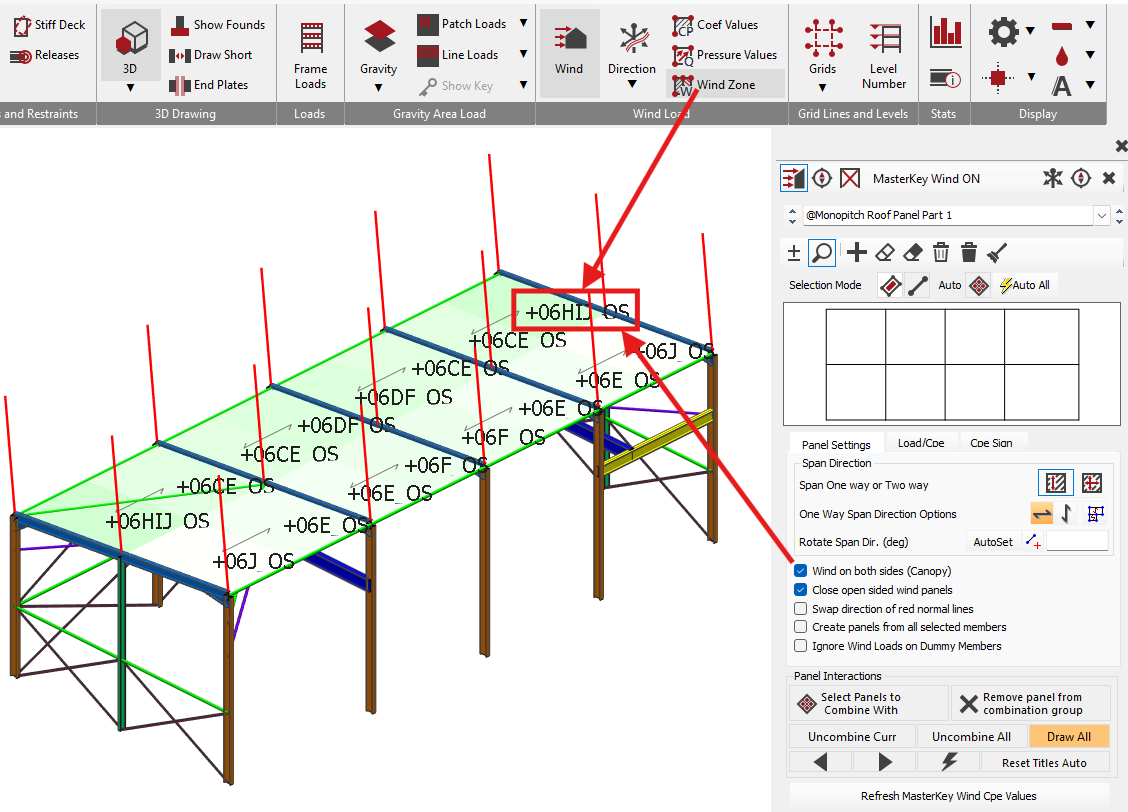
Open-sided panels will be labelled with an _OS suffix (for open-sided structure), depending on the display format. For example, for an open sided roof with a 6 degree pitch and zone panel XX:
- +06XX_OS
How MasterFrame Treats the Open Side
Roof Settings
Once the roof is set to 'Wind on both sides', the software identifies the connected walls and determines how many sides of the structure are open. The wind pressures on the walls then will adjusted accordingly.
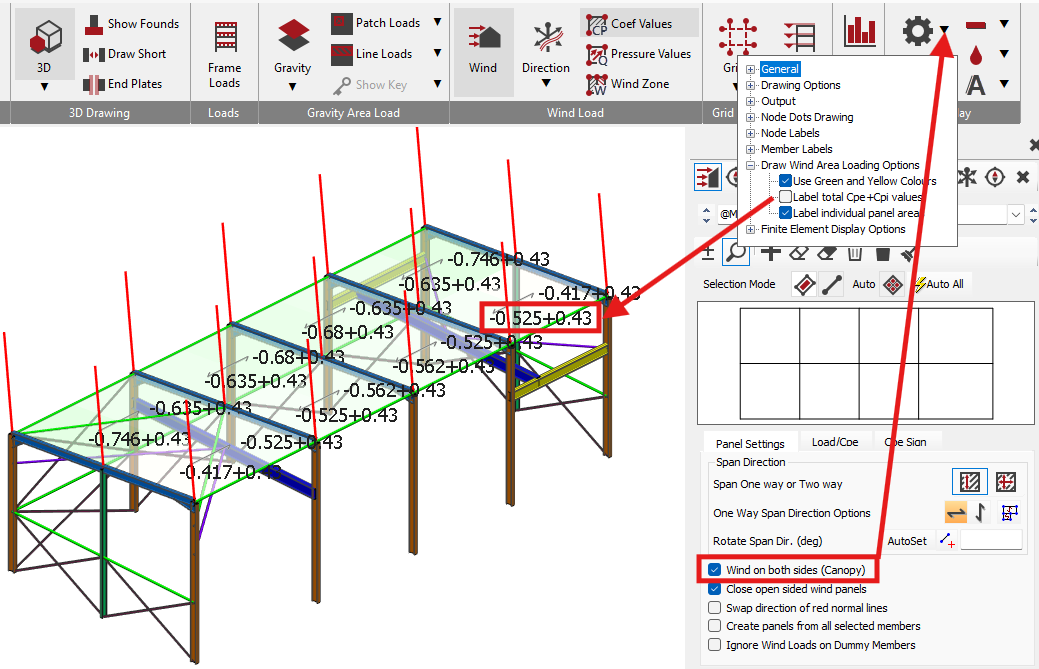
Users can see visually what Cpe + Cpi values are generated for each of the panels, by toggling the Wind Area Loading Display Settings.
Cpe = external pressure coefficient
Cpi = internal pressure coefficient
If the option Label total Cpe + Cpi values is enabled, the software may instead display the combined value. For troubleshooting, it is often clearer to display the separate values so that the external and internal components can be reviewed independently.
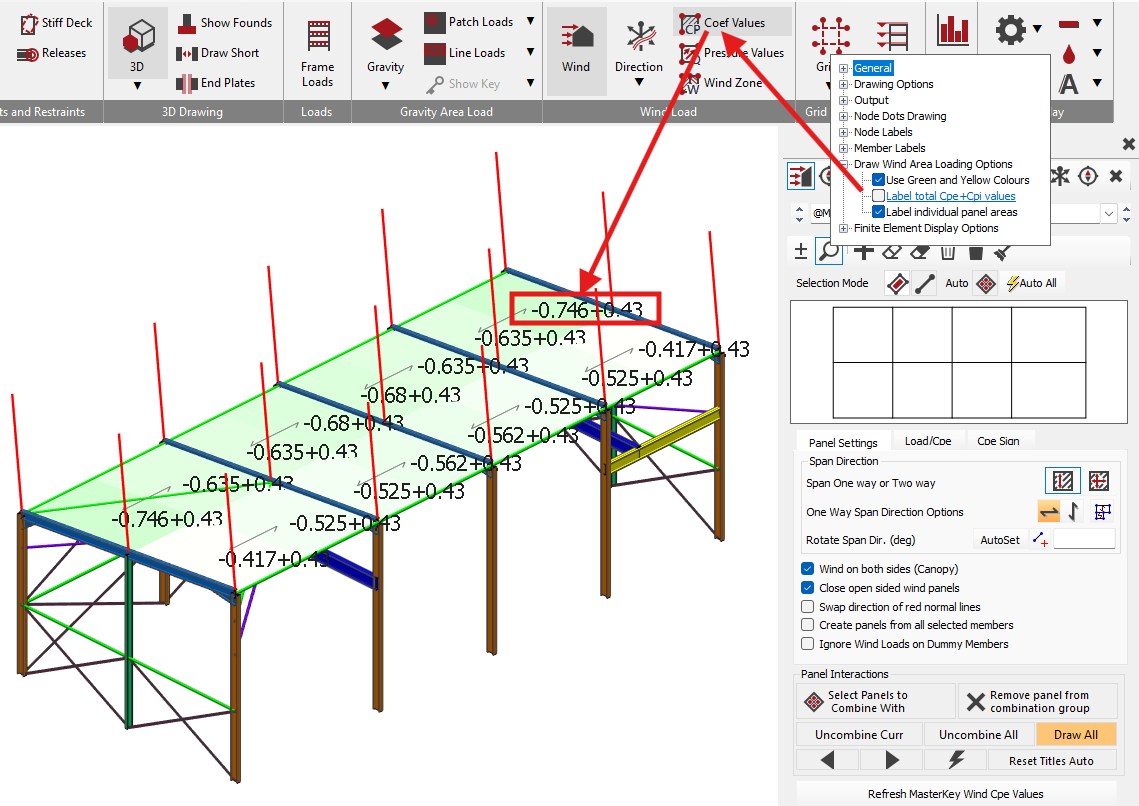
The external pressure coefficients for the wall and roof panels are still determined in the normal way.
However, the internal pressure coefficients are then applied based on the open-sided structure rules, using BS 6399-2 Table 18.
Wall Settings
For an open-sided portal frame, the roof should be set as Wind on both sides (Canopy) and the walls should remain as normal wind panels.
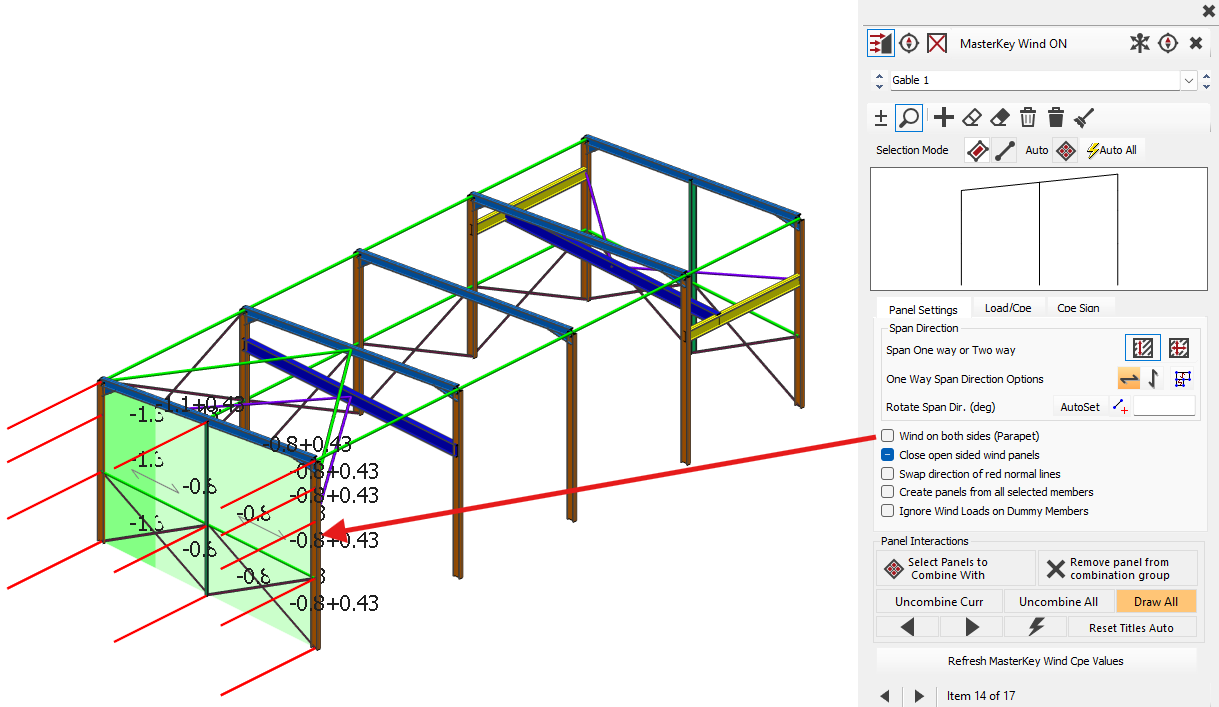
This means the software assumes that wind can blow into the open side and apply internal pressure to the underside of the roof and the internal face of the remaining enclosed walls.
For example, if wind blows into the open elevation, MasterFrame will apply the relevant internal pressure effects to the inside of the rear wall without needing the rear wall to be set as Wind on both sides.
Roof Panel Pressure Co-efficients Rules
A roof panel requires 3 wall panels connected to it, for the roof panel to automatically generate the pressure co-efficients. An example of how the roof panels wind co-efficients are highlighted below:

- Open-sided mono-pitch roof
- Single Roof panel
- bound by 3 wall panels. Pressure coefficients will be generated automatically
- Open-sided duo-pitch roof (with fully open wall panel on RHS)
- LHS Roof Panel
- bound by 3 wall panels. Pressure coefficients will be generated automatically
- RHS Roof Panel
- bound by 2 wall panels only. Pressure coefficients will not be generated automatically. Users can Override their Cpe Values via 📄 Load / Cpe Tab and Funnelling
- Open-sided duo-pitch roof (with part closed top wall panel on RHS)
- LHS Roof Panel
- bound by 3 wall panels. Pressure coefficients will be generated automatically
- RHS Roof Panel:
- bound by 3 panels (2 walls and a 3rd header panel). Pressure coefficients will be generated automatically
Panel Normal Direction
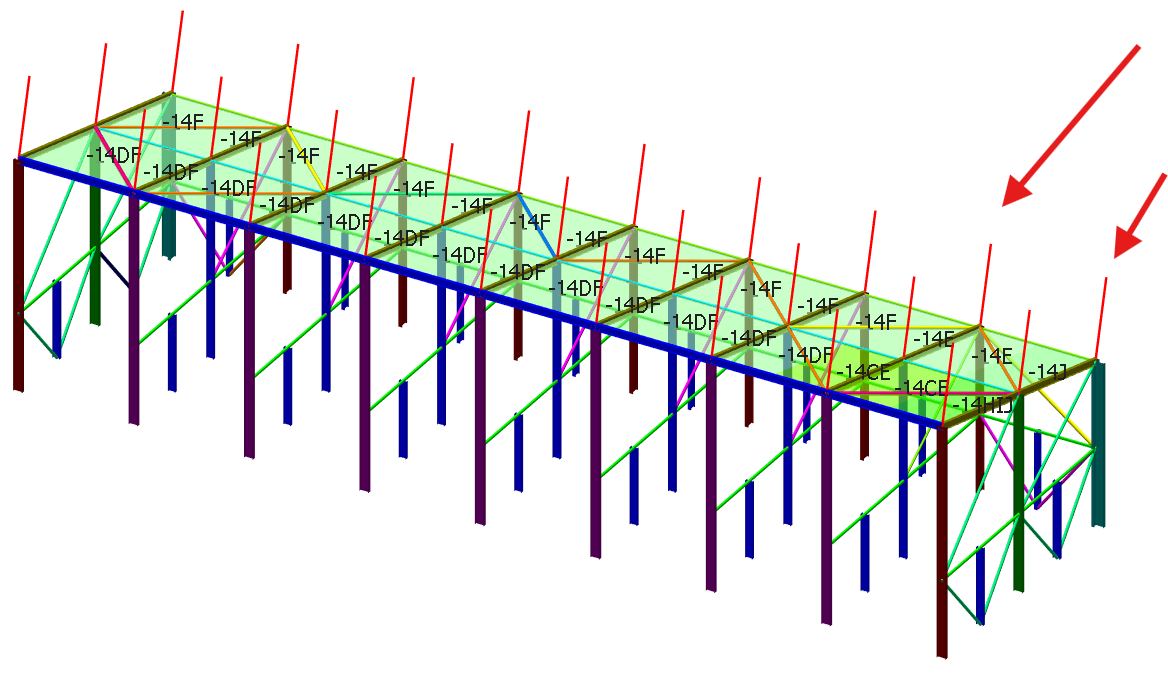
When defining roof and wall panels, check the red normal lines.
The red normal lines indicate the external face of the panel. They should point outward, away from the building interior. If they point in the wrong direction, use the option to swap the panel direction.
Correct panel direction is important because it allows the software to distinguish between external and internal pressure effects.
Practical Modelling Guidance
Model the roof and any enclosed wall faces using wind panels.
Do not model wind panels on completely open elevations.
Set the roof panels to Wind on both sides (Canopy).
Leave connected wall panels as normal external panels.
Check that red normal lines point outward.
Turn on Wind Zones and confirm that OS appears on the relevant panels.
Review coefficient values to confirm that both external and internal pressure components are being considered.