
IDEA Statica
You can open the IDEA StatiCa Link dialog from within an open MasterFrame File. From the top menu go to:
BIM Exchange > IDEA StatiCa
If your model hasn't been analysed, it will automatically analyse before opening the dialog.
IDEA StatiCa Link Footer
The footer of the link displays connection status information and provides controls for resetting member selections.
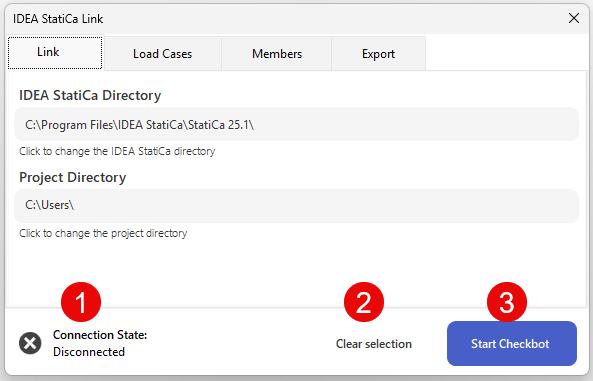
Link Tab
This tab allows you to manage the version of IDEA StatiCa Checkbot that the link interacts with, as well as the location of your project directory.
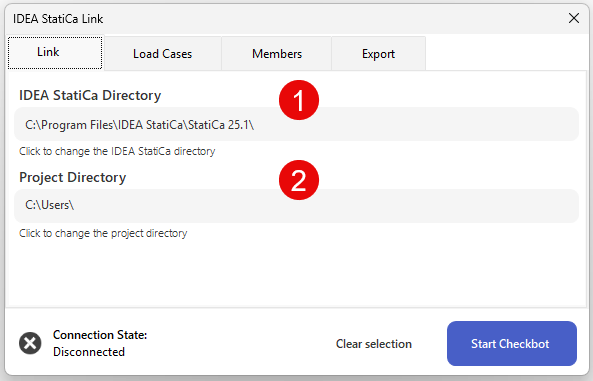
1. IDEA StatiCa Directory: MasterSeries will automatically try to detect and use the latest version of IDEA StatiCa Checkbot. If it fails to do so or if you wish to use a different version, simply click the label and browse to a specific version.
2. Project Directory: This is where your IDEA StatiCa Checkbot files, including link settings, are stored. By default, this folder is located in the same directory as your MasterFrame file, under a folder named "IDEA StatiCa Link." You can click the label to change the directory or create multiple directories for the same MasterFrame file. This is particularly useful if you want to separate model exports into different projects.
Load Cases Tab
The Load Cases tab lets you select which load cases to export to the IDEA StatiCa Checkbot model. To ensure quicker import times, it’s recommended to export only the necessary load cases.
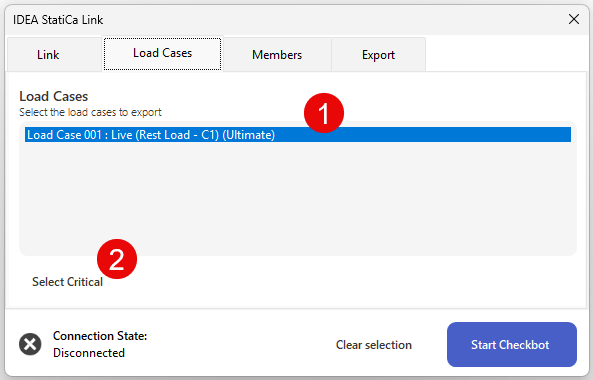
1. Load Cases: This is a list of all valid load cases that can be imported into Checkbot. You can multi-select using the Shift or Ctrl keys.
2. Select Critical: Clicking this will prompt MasterFrame to automatically select the most critical load cases from your model. Always verify the selection to make sure it's accurate.
Members Tab
This tab lets you configure how member data is exported to Checkbot. Typically, you’ll want to use Physical Member export unless you require intermediate connection data.
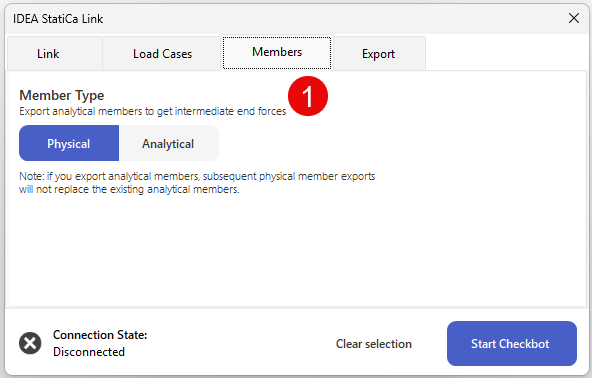
1. Member Type: Select whether to export members as Physical or Analytical members. Analytical members export data at every node point, while Physical members export only the actual members (e.g., super members).
Analytical Members Use Case: If your model includes a truss and you want to design intermediate connections between the top and bottom chords, choose Analytical Members to export force data at those connection points.
Export Tab
Configure how you want to export data from MasterFrame. If you're only interested in connection design, selecting the Connections export option will result in a faster import to Checkbot.
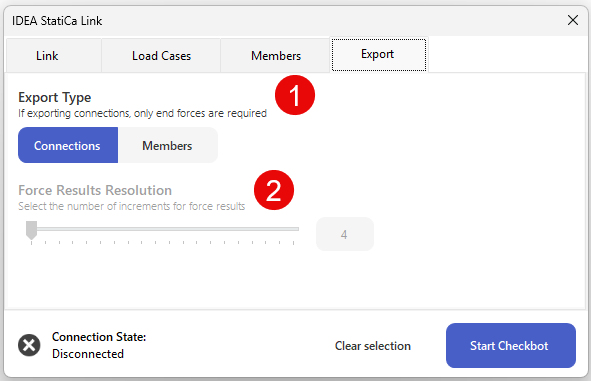
1. Export Type:
Choose between Connections and Members.
- Connections: Exports only the necessary force results, with 2 results at each member end.
- Members: Exports between 4 and 80 results per member to create a more detailed force profile. The more results you select, the slower the import to Checkbot will be.
2. Force Result Resolution: If exporting member data, you can adjust the resolution of the force results using a slider. The minimum is 4 results, and the maximum is 80.